Vue3 核心特性与实践指南
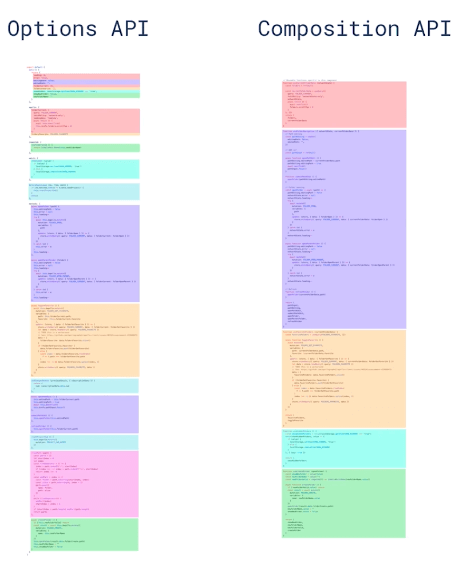
Vue3 是一个革命性的版本,它不仅带来了性能的提升,更重要的是引入了组合式 API,彻底改变了我们编写 Vue 组件的方式。本文将深入探讨 Vue3 的核心特性,并通过实际案例展示如何更好地使用这些特性。
1. 组合式 API (Composition API)
组合式 API 是 Vue3 最重要的特性之一,它解决了 Vue2 中代码组织的问题,使得逻辑复用和代码组织变得更加灵活。
1.1 基础概念
setup()是组合式 API 的入口点,它在组件实例创建之前执行- 由于
setup在组件实例创建之前执行,所以无法访问this - Vue2 的选项式 API 写法仍然完全兼容,可以渐进式迁移
setup函数接收两个参数:props和context
import { defineComponent } from 'vue'

export default defineComponent({
  props: {
    title: String
  },
  setup(props, context) {
    // props 是响应式的,但不要解构它
    console.log(props.title)

    // context 包含 attrs, slots, emit 等
    const { attrs, slots, emit } = context

    return {
      // 返回的内容会暴露给模板
    }
  }
})
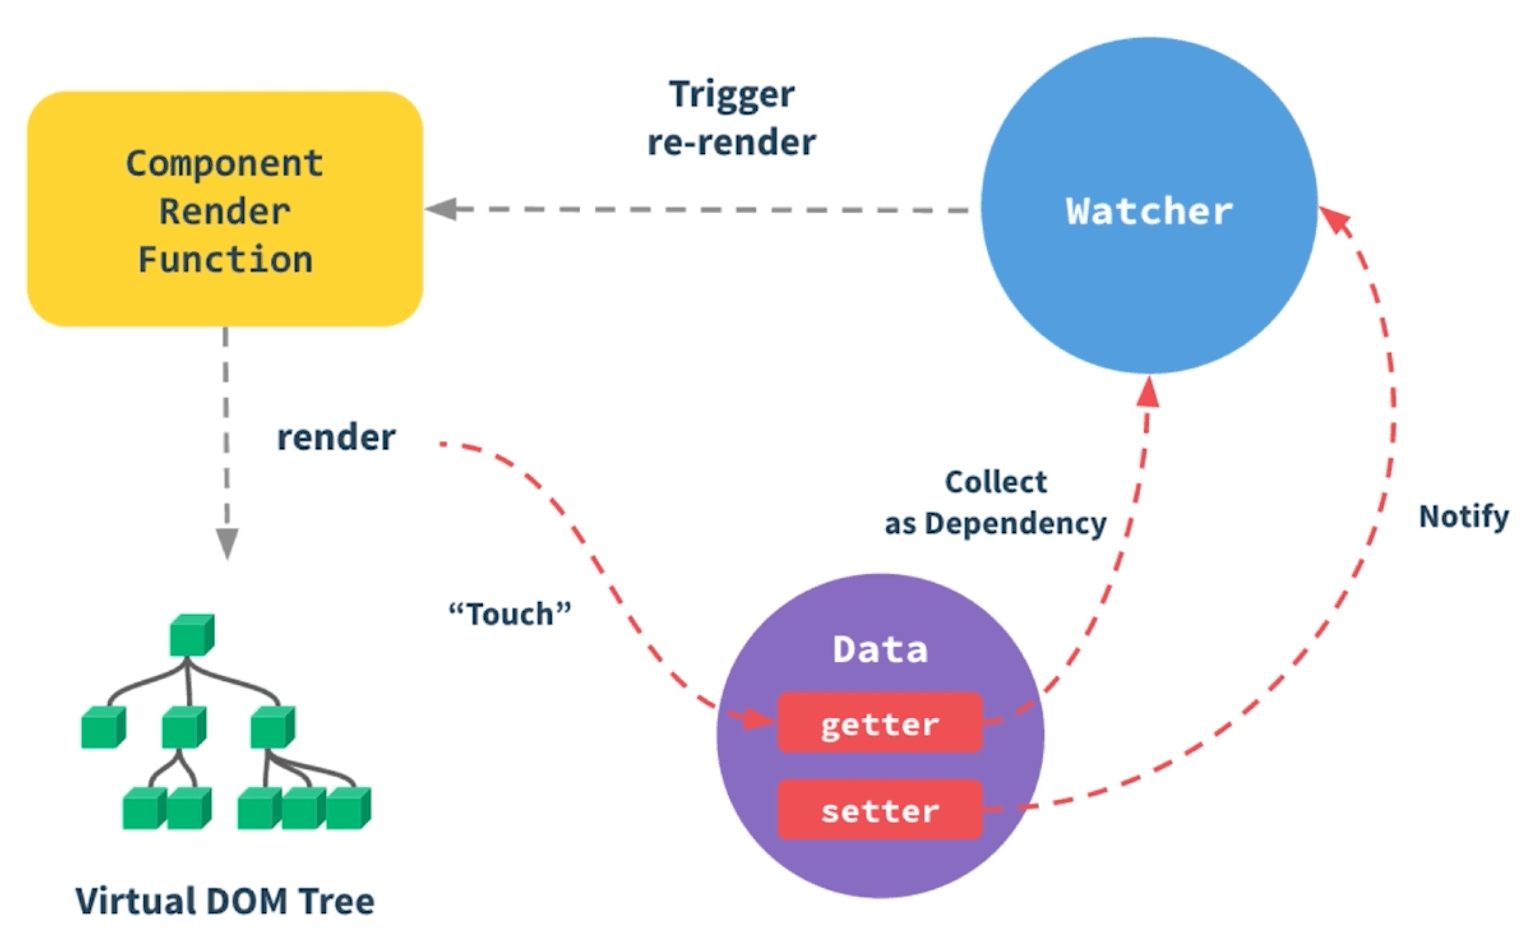
1.2 响应式系统
Vue3 的响应式系统基于 Proxy 实现,提供了更强大的响应式能力。
ref 的使用
import { ref, watchEffect } from 'vue'

export default {
  setup() {
    // ref 用于基本类型的响应式
    const count = ref(0)

    // 访问 ref 的值需要使用 .value
    console.log(count.value) // 0

    // 在模板中会自动解包,不需要 .value
    const increment = () => {
      count.value++
    }

    // watchEffect 会自动追踪依赖
    watchEffect(() => {
      console.log('count is:', count.value)
    })

    return {
      count,
      increment
    }
  }
}
reactive 的使用
import { reactive, computed, watch } from 'vue'

export default {
  setup() {
    // reactive 用于对象的响应式
    const state = reactive({
      count: 0,
      double: computed(() => state.count * 2),
      history: []
    })

    // 监听单个属性
    watch(
      () => state.count,
      (newValue, oldValue) => {
        state.history.push({
          newValue,
          oldValue,
          timestamp: new Date()
        })
      }
    )

    // 深度监听对象
    watch(
      () => state,
      (newValue) => {
        console.log('state changed:', newValue)
      },
      { deep: true }
    )

    return {
      state
    }
  }
}
1.3 生命周期钩子
Vue3 的生命周期钩子都带有 on 前缀,并且只能在 setup 中使用:
import {
  onBeforeMount,
  onMounted,
  onBeforeUpdate,
  onUpdated,
  onBeforeUnmount,
  onUnmounted,
  onErrorCaptured
} from 'vue'

export default {
  setup() {
    onBeforeMount(() => {
      console.log('组件挂载前')
    })

    onMounted(() => {
      console.log('组件已挂载')
      // 可以在这里进行 DOM 操作
    })

    onBeforeUpdate(() => {
      console.log('组件更新前')
    })

    onUpdated(() => {
      console.log('组件已更新')
    })

    onBeforeUnmount(() => {
      console.log('组件卸载前')
    })

    onUnmounted(() => {
      console.log('组件已卸载')
      // 可以在这里清理定时器、事件监听等
    })

    onErrorCaptured((err, instance, info) => {
      console.error('捕获到错误:', err)
      return false // 阻止错误继续传播
    })
  }
}
2. 响应式工具函数
2.1 toRefs 和 toRef
import { reactive, toRefs, toRef } from 'vue'

export default {
  setup() {
    const state = reactive({
      count: 0,
      name: 'Vue3'
    })

    // toRefs 将整个对象转换为响应式引用
    const { count, name } = toRefs(state)

    // toRef 创建单个属性的响应式引用
    const countRef = toRef(state, 'count')

    // 这些引用都是响应式的
    console.log(count.value) // 0
    console.log(name.value) // 'Vue3'

    return {
      count,
      name,
      countRef
    }
  }
}
2.2 其他响应式工具
import {
  isRef,
  unref,
  isReactive,
  isReadonly,
  markRaw
} from 'vue'

export default {
  setup() {
    const count = ref(0)

    // 检查是否是 ref
    console.log(isRef(count)) // true

    // 获取 ref 的值,如果不是 ref 则返回原值
    console.log(unref(count)) // 0

    const state = reactive({})
    // 检查是否是响应式对象
    console.log(isReactive(state)) // true

    // 检查是否是只读对象
    console.log(isReadonly(readonly(state))) // true

    // 标记对象为非响应式
    const raw = markRaw({ count: 0 })
  }
}
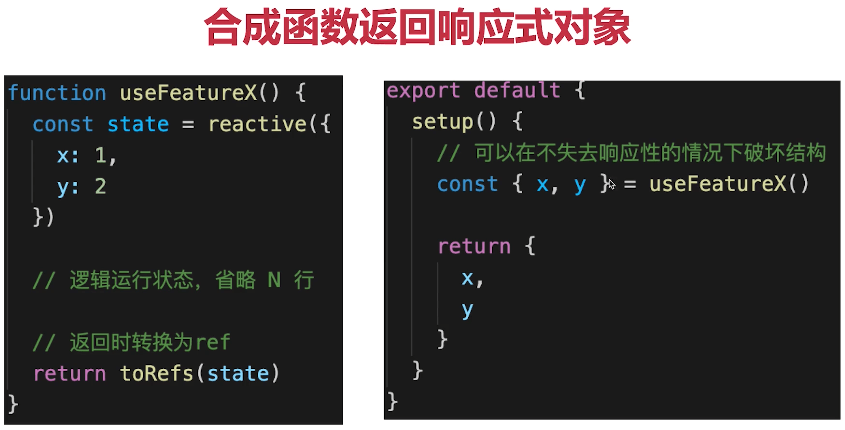
3. 自定义 Hook
自定义 Hook 是组合式 API 最强大的特性之一,它让我们能够轻松地复用逻辑。
3.1 鼠标位置 Hook
import { toRefs, reactive, onMounted, onUnmounted } from 'vue'

function useMousePosition() {
  const state = reactive({
    x: 0,
    y: 0,
    isMoving: false
  })

  const updateMouse = (e: MouseEvent) => {
    state.x = e.pageX
    state.y = e.pageY
    state.isMoving = true

    // 使用 requestAnimationFrame 优化性能
    requestAnimationFrame(() => {
      state.isMoving = false
    })
  }

  onMounted(() => {
    document.addEventListener('mousemove', updateMouse)
  })

  onUnmounted(() => {
    document.removeEventListener('mousemove', updateMouse)
  })

  return toRefs(state)
}
3.2 网络请求 Hook
import { ref, onMounted } from 'vue'

interface UseFetchOptions {
  immediate?: boolean
  onSuccess?: (data: any) => void
  onError?: (error: Error) => void
}

function useFetch<T>(url: string, options: UseFetchOptions = {}) {
  const data = ref<T | null>(null)
  const error = ref<Error | null>(null)
  const loading = ref(false)

  const fetchData = async () => {
    loading.value = true
    try {
      const response = await fetch(url)
      data.value = await response.json()
      options.onSuccess?.(data.value)
    } catch (e) {
      error.value = e as Error
      options.onError?.(e as Error)
    } finally {
      loading.value = false
    }
  }

  if (options.immediate) {
    onMounted(fetchData)
  }

  return {
    data,
    error,
    loading,
    fetchData
  }
}

// 使用示例
export default {
  setup() {
    const { data, error, loading, fetchData } = useFetch('/api/users', {
      immediate: true,
      onSuccess: (data) => {
        console.log('数据加载成功:', data)
      }
    })

    return {
      data,
      error,
      loading,
      fetchData
    }
  }
}
4. Teleport 组件
Teleport 是 Vue3 新增的组件,用于将组件的内容传送到 DOM 树的其他位置。这在处理模态框、弹出框等场景特别有用。
<template>
  <div class="app">
    <button @click="showModal = true">打开模态框</button>

    <Teleport to="body">
      <div v-if="showModal" class="modal-overlay" @click="closeModal">
        <div class="modal-content" @click.stop>
          <h2>{{ title }}</h2>
          <p>{{ content }}</p>
          <div class="modal-footer">
            <button @click="confirm">确认</button>
            <button @click="closeModal">取消</button>
          </div>
        </div>
      </div>
    </Teleport>
  </div>
</template>

<script>
import { ref } from 'vue'

export default {
  props: {
    title: {
      type: String,
      default: '提示'
    },
    content: {
      type: String,
      required: true
    }
  },

  setup(props, { emit }) {
    const showModal = ref(false)

    const closeModal = () => {
      showModal.value = false
      emit('close')
    }

    const confirm = () => {
      emit('confirm')
      closeModal()
    }

    return {
      showModal,
      closeModal,
      confirm
    }
  }
}
</script>

<style scoped>
.modal-overlay {
  position: fixed;
  top: 0;
  left: 0;
  right: 0;
  bottom: 0;
  background: rgba(0, 0, 0, 0.5);
  display: flex;
  align-items: center;
  justify-content: center;
}

.modal-content {
  background: white;
  padding: 20px;
  border-radius: 8px;
  min-width: 300px;
}

.modal-footer {
  margin-top: 20px;
  text-align: right;
}

.modal-footer button {
  margin-left: 10px;
}
</style>
5. 性能优化
Vue3 在性能方面有显著提升
5.1 虚拟 DOM 优化
- 静态树提升:将静态内容提升到渲染函数之外
- 静态属性提升:将静态属性提升到渲染函数之外
- 补丁标记:为动态节点添加标记,优化 diff 算法
5.2 响应式系统优化
import { shallowRef, shallowReactive, markRaw } from 'vue'

export default {
  setup() {
    // 浅层响应式,只跟踪顶层属性
    const shallowState = shallowReactive({
      user: {
        name: 'Vue3',
        address: {
          city: 'Beijing'
        }
      }
    })

    // 浅层 ref,只跟踪 .value 的变化
    const shallowRef = shallowRef({
      count: 0
    })

    // 标记为非响应式
    const staticData = markRaw({
      config: {
        theme: 'dark'
      }
    })
  }
}
5.3 组件优化
import { defineAsyncComponent } from 'vue'

export default {
  components: {
    // 异步组件
    AsyncComponent: defineAsyncComponent(() =>
      import('./AsyncComponent.vue')
    ),

    // 带加载状态的异步组件
    AsyncComponentWithLoading: defineAsyncComponent({
      loader: () => import('./AsyncComponent.vue'),
      loadingComponent: LoadingComponent,
      errorComponent: ErrorComponent,
      delay: 200,
      timeout: 3000
    })
  }
}
6. TypeScript 支持
Vue3 使用 TypeScript 重写,提供了更好的类型支持。
6.1 组件类型定义
import { defineComponent, PropType } from 'vue'

interface User {
  id: number
  name: string
  age: number
}

export default defineComponent({
  props: {
    // 基础类型
    title: {
      type: String,
      required: true
    },

    // 对象类型
    user: {
      type: Object as PropType<User>,
      required: true
    },

    // 数组类型
    items: {
      type: Array as PropType<User[]>,
      default: () => []
    }
  },

  setup(props) {
    // props 类型会被正确推导
    console.log(props.user.name)

    return {}
  }
})
6.2 组合式 API 类型
import { ref, computed } from 'vue'

interface State {
  count: number
  name: string
}

export default defineComponent({
  setup() {
    // ref 类型
    const count = ref<number>(0)

    // reactive 类型
    const state = reactive<State>({
      count: 0,
      name: 'Vue3'
    })

    // computed 类型
    const double = computed<number>(() => count.value * 2)

    return {
      count,
      state,
      double
    }
  }
})
7. 调试技巧
7.1 渲染追踪
import { onRenderTracked, onRenderTriggered } from 'vue'

export default {
  setup() {
    onRenderTracked((event) => {
      console.log('组件渲染追踪:', {
        target: event.target,
        type: event.type,
        key: event.key
      })
    })

    onRenderTriggered((event) => {
      console.log('组件渲染触发:', {
        target: event.target,
        type: event.type,
        key: event.key,
        newValue: event.newValue,
        oldValue: event.oldValue
      })
    })
  }
}
7.2 性能分析
import { onMounted, onUnmounted } from 'vue'

export default {
  setup() {
    let startTime

    onMounted(() => {
      startTime = performance.now()
    })

    onUnmounted(() => {
      const endTime = performance.now()
      console.log(`组件生命周期: ${endTime - startTime}ms`)
    })
  }
}
8. 最佳实践
8.1 代码组织
// composables/useCounter.js
import { ref, computed } from 'vue'

export function useCounter(initialValue = 0) {
  const count = ref(initialValue)
  const double = computed(() => count.value * 2)

  function increment() {
    count.value++
  }

  function decrement() {
    count.value--
  }

  return {
    count,
    double,
    increment,
    decrement
  }
}

// components/Counter.vue
import { useCounter } from '../composables/useCounter'

export default {
  setup() {
    const { count, double, increment, decrement } = useCounter()

    return {
      count,
      double,
      increment,
      decrement
    }
  }
}
8.2 状态管理
// store/counter.js
import { reactive } from 'vue'

export const store = reactive({
  count: 0,
  increment() {
    this.count++
  }
})

// components/Counter.vue
import { store } from '../store/counter'

export default {
  setup() {
    return {
      store
    }
  }
}
9. 迁移建议
从 Vue2 迁移到 Vue3 时,建议采用渐进式迁移策略:
- 使用
@vue/composition-api插件在 Vue2 中提前使用组合式 API - 优先迁移新功能到组合式 API
- 使用
defineComponent包装组件获得更好的类型推导 - 注意生命周期钩子的变化
- 使用新的响应式 API 替代
Vue.observable
10. 总结
Vue3 带来了许多激动人心的新特性,特别是组合式 API 的引入,使得代码组织更加灵活,逻辑复用更加方便。通过合理使用这些特性,我们可以构建出更易维护、性能更好的应用。